
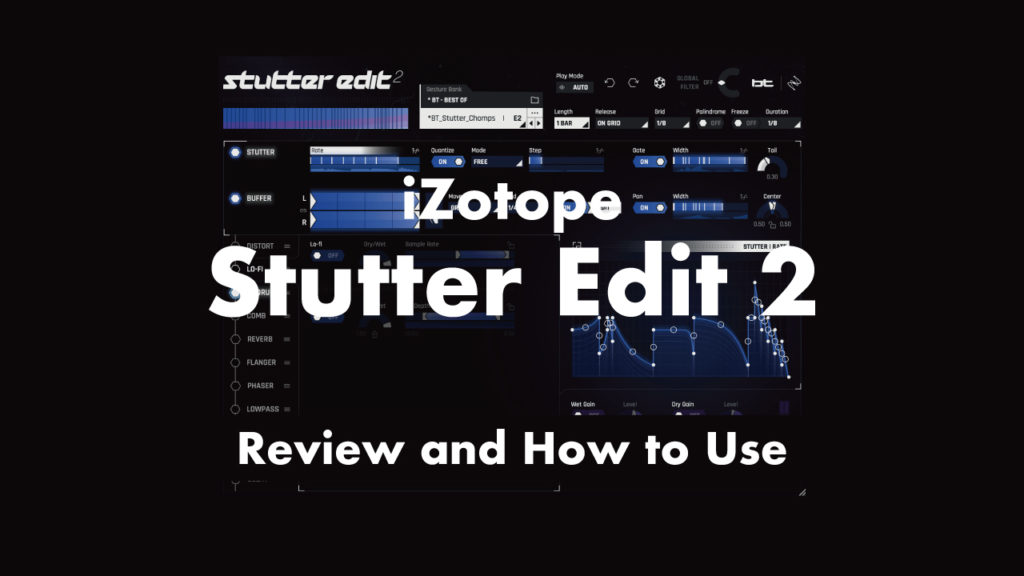
Version 2 of iZotope’s Stutter Edit has been released!
It has already become a hot topic, and I think many people have already acquired it.
In this article, I am going to explain the advantages and disadvantages of iZotope “Stutter Edit 2” and how to use it. Please read the details below;
1. What is iZotope “Stutter Edit 2” ?
Stutter Edit 2 is version 2 of the plugin effect developed by BT and iZotope.
This is an effect that can mainly slice and chop samples, tracks, and mixes, but there are also 11 other effects that can be set in detail, and you can automate changes in parameters over time.
| Development company | iZotope |
| Price(list price) | 199USD
Creative Suite 2(Stutter Edit 2, VocalSynth 2, Iris 2, Trash 2, BreakTweaker Expanded) 399USD |
Stutter Edit 2 is also available as a monthly payment with Splice Plugins. Unlike regular monthly payments, Splice Plugins have no obligation to pay and can be stopped at any time. Click here for a detailed article on Splice Plugins.

iZotope Stutter Edit 2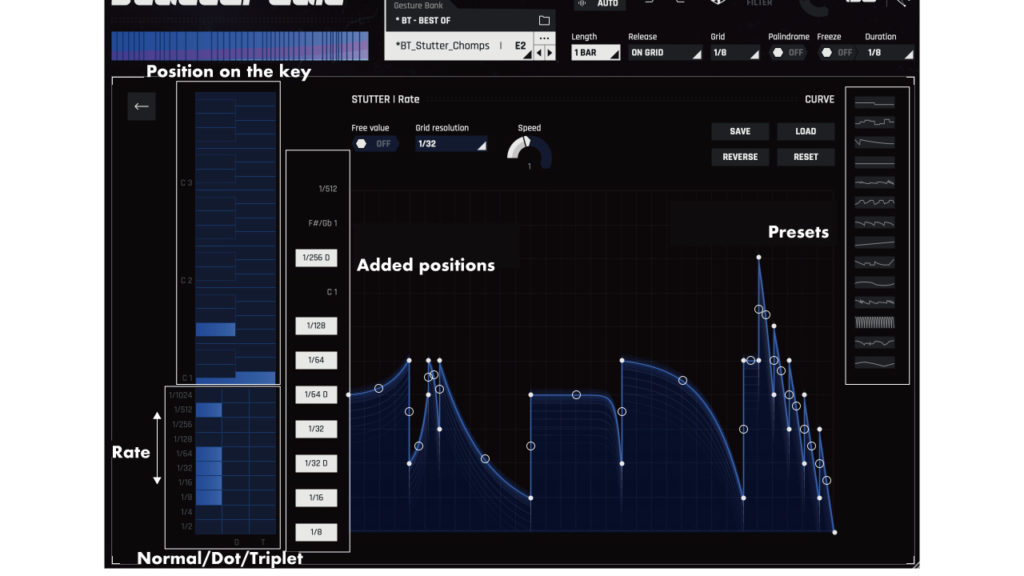 Plugin Boutique
2. Advantages
There are three advantages when using iZotope “Stutter Edit 2”
- You can create changes not only for slices but for various effects over time
- Best plugin effects for DJ live
- No need to chop the waveform in your DAW
(1)You can create changes not only for slices but for various effects over time
There are 11 types of effects in addition to STUTTER and BUFFER, and you can create a “Time-Variable Modifier (TVM)” that changes each parameter freely on the time axis.
(2)Best plugin effects for DJ live
I think that it can be used considerably for real-time effects with DJ other than composition.
You can create presets and apply them freely using a MIDI controller.
(3)No need to chop the waveform in your DAW

If you try to reproduce an effect like Stutter Edit 2 in your DAW, you will need to cut and paste it in a large amount of time, even if you can reproduce it.
Stutter Edit 2 shortens that process. It will also offer new possibilities with a wealth of parameters.
3. Disadvantages that you should know before using
Hard to understand how to use
The specifications can be made just by playing with the presets, but there are some parts that are difficult to understand how to use.
Please refer to the explanation in the usage section below.
4. How to use
From here, I will explain how to use it.
Click here for the official “Learn Stutter Edit 2 in 10 Minutes“.
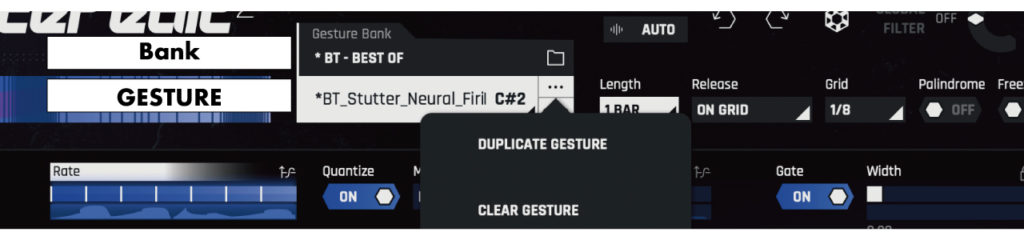
In Stutter Edit 2, select Bank from the top and select multiple effect presets “GESTURE” that are assigned to keys for each Bank.
Next, select Play Mode at the top from Auto Mode and MIDI Mode.
Auto Mode
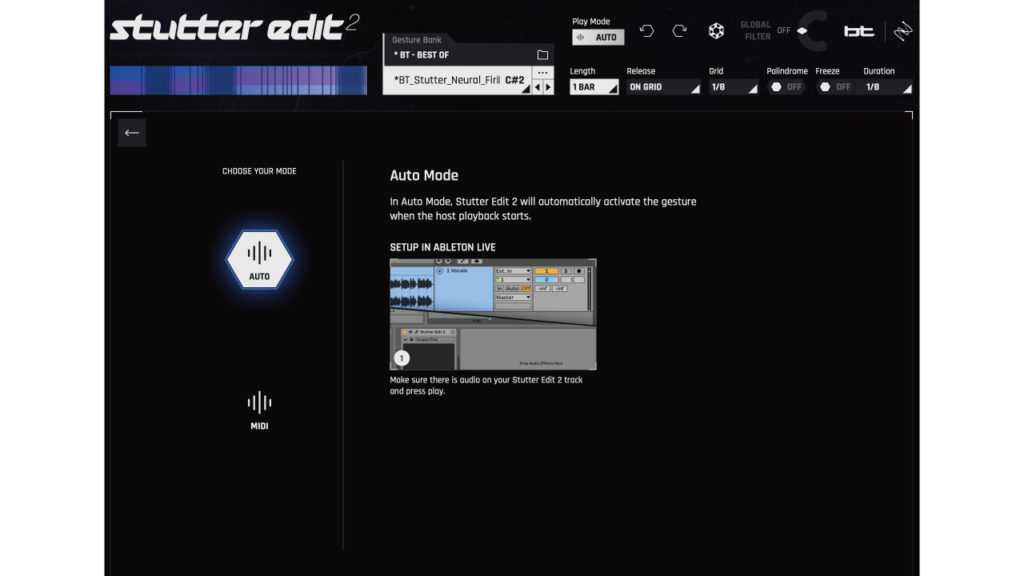
Auto mode is a general effect mode in which you can select the bank and gesture at the top and apply the effect to the track immediately.
MIDI Mode
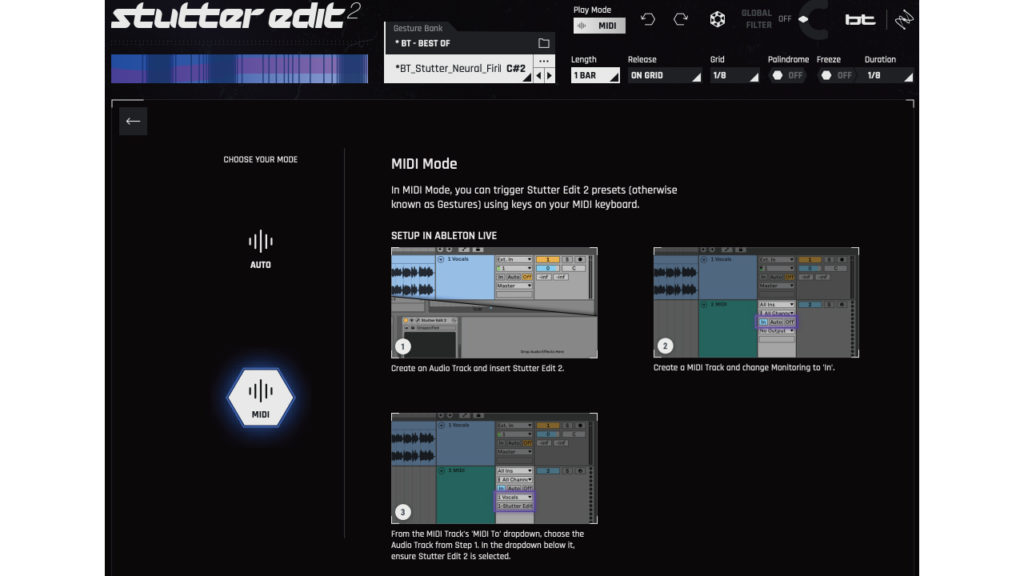
As its name implies, MIDI Mode is controlled by MIDI to apply effects. The control method depends on each DAW.
Other upper parameters are as follows.
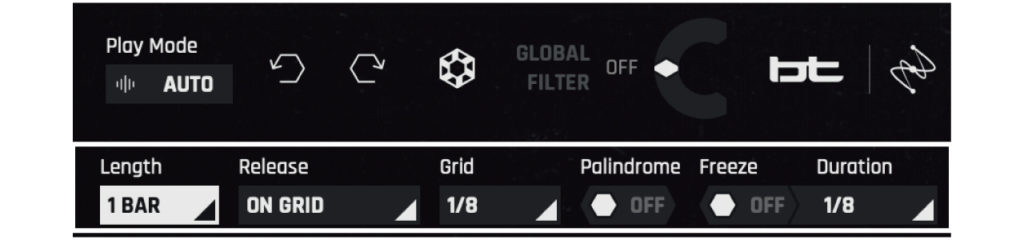
Length: Determines the length of the gesture cycle. You can select the length from triplets of 16th notes up to two measures.
Select how to end the gesture. You can choose from five release options. ON GRID: After the MIDI note ends, the gesture itself waits until the next grid point before ending. FULL GESTURE: The entire gesture is played from beginning to end. LATCH: Plays and holds until you trigger the gesture again. You can use it if you don’t want to lose the effect during the gesture. INSTANT: The MIDI note that triggers will end immediately. STICK: Effects are locked at the end of the gesture timeline.
GRID: In the Grid menu, set the start and end positions of the gesture. If the Grid is 1/8, the gesture will always start with the next eighth note.
FREEZE / Duration: Capture the part determined by Duration and repeat it indefinitely.
Palindrome: Select whether to reverse the direction of the gesture or start again from the start position when the gesture reaches the end.
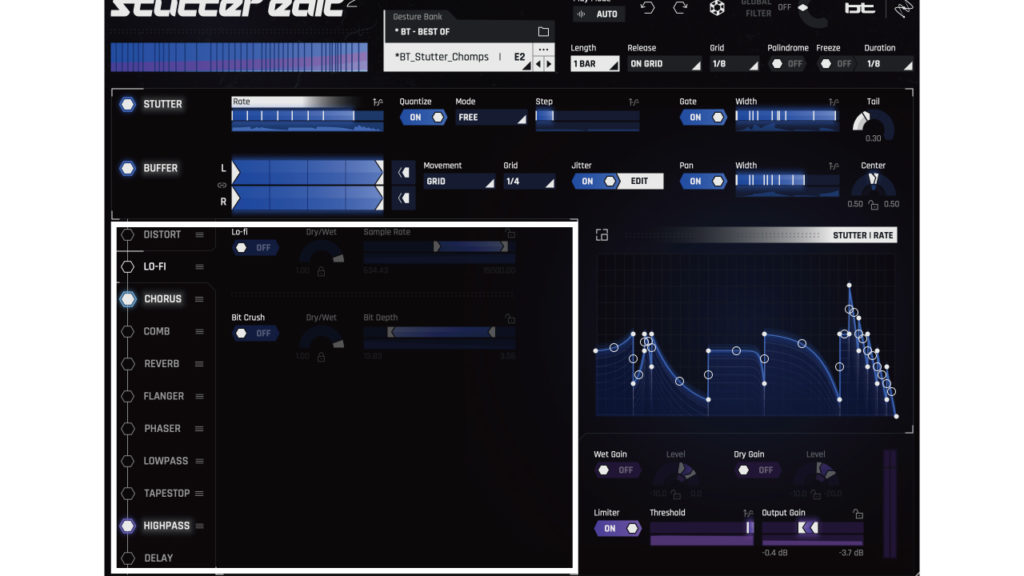
Time-Variable Modifier(TVM)
Depending on the parameter, clicking can set the Time-Variable Modifier (TVM) on the right side. The left and right represent time, and the top and bottom represent amount and rate. Double click to add or remove points and drag to adjust. You can access the detail page from the square mark on the upper left.
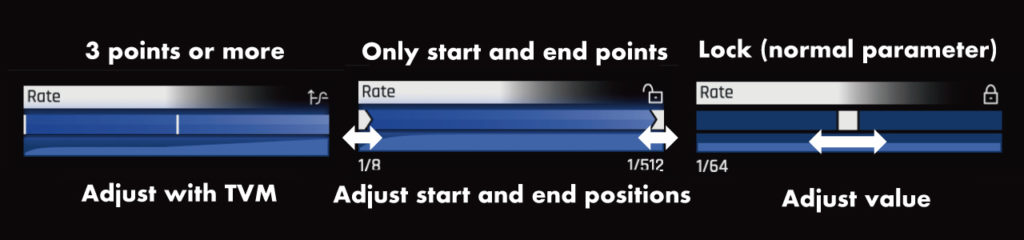
If you don’t want to use TVM, click the lock icon in each parameter to lock the changes. The lock icon appears in the upper right corner of the parameter only at the start and end points.
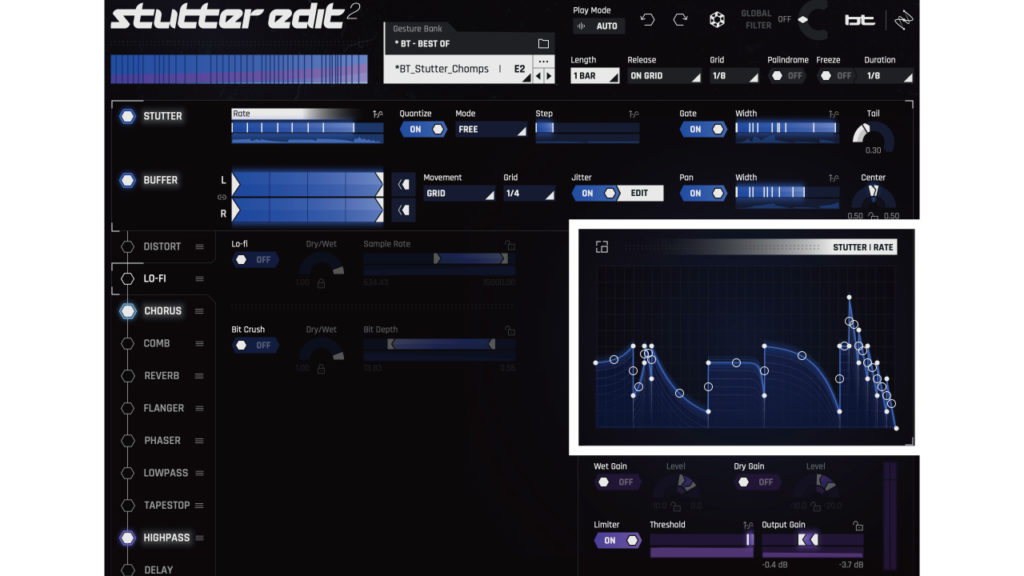
STUTTER

Create a slice. Turn STUTTER and other effects on and off by selecting the hexagonal button on the far left.
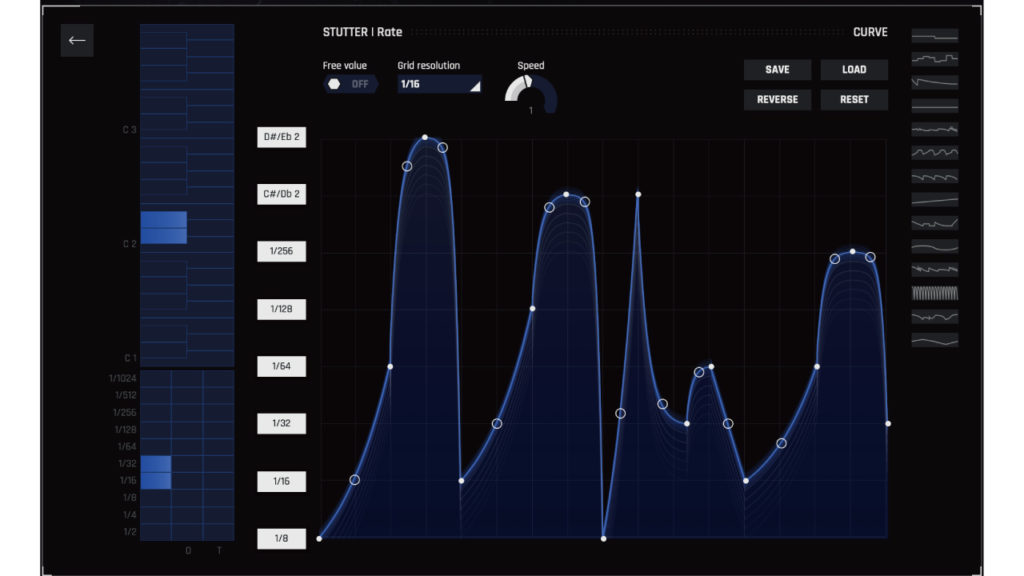
STUTTER | RATE(TVM)
If you select Rate, you can draw the slice value from the TVM on the right.
On the STUTTER | RATE detail page, you can add presets on the right and new value positions from the left column. The lower left rate is D for dots and T for triplet note value. When you match the pitch selected on the keyboard, that pitch will be repeated.
Free Value: When turned on, you can freely adjust the value in Hz.
Grid resolution: Set the left and right time axis grids.
Speed: Adjusts the moving speed of the envelope. At 1, the scale is as per the normal speed “Length”.
Quantize
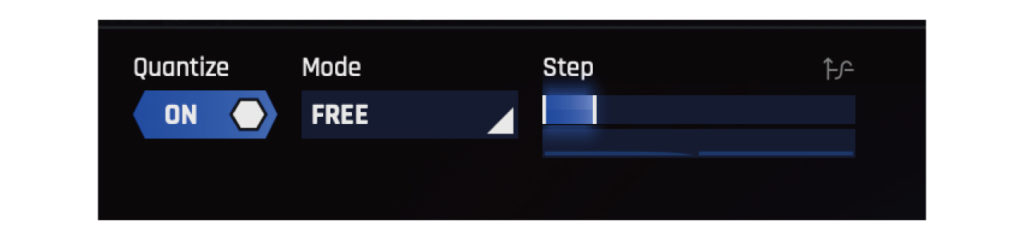
When Quantize is off, it will move smoothly between the curves you draw. When Quantize is on, it locks to different values as you pass through the Rate control’s timeline, depending on the Mode and Step parameters.
Step: Step determines how long you stay at the Rate value while moving through the timeline.
Mode

Mode affects how the selected notes are played after you select the note spacing in Rate. The mode menu offers several options for changing how the stutter plays.
FREE: Ignore the value and keep the length of the stutter closest to the curve progression.
CLOSEST: Only the value of the near Rate parameter is valid.
WALK: Moves the Rate parameter’s note value for each new step.
SKIP: Moves the note value of the Rate parameter in a pattern
STAGGER: Moves the Rate parameter value by changing it according to the envelope direction.
RANDOM: Randomly moves the value of the Rate parameter.
When locking RATE, Quantize will be based on the position of the value selected on the left side of the TVM detail page of RATE.
Gate
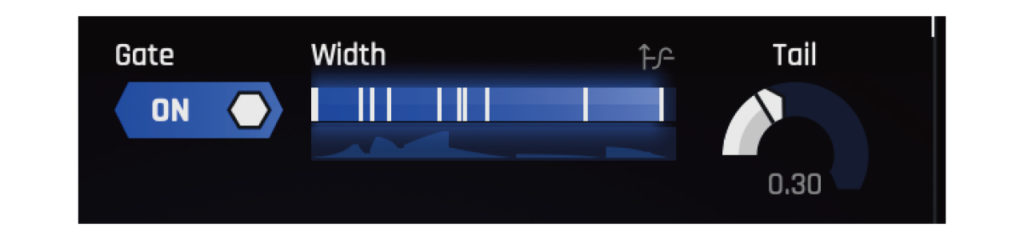
Width determines the rate at which repeating audio is gated. Tail sets the release part of the gate. When Width and Tail are 0, there is no sound.
BUFFER

The buffer changes the playback method and playback position of the temporarily saved audio. In other words, it is possible to change the playback part (buffer position).
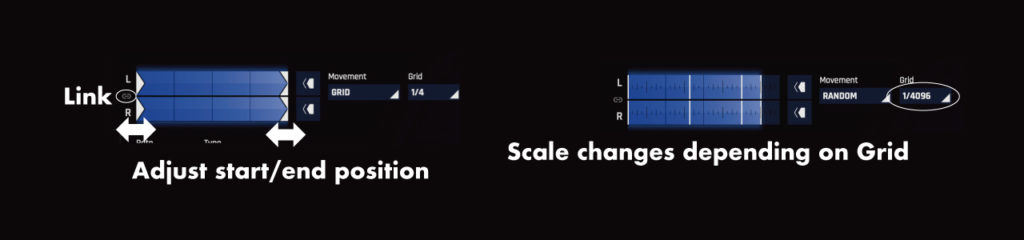
The playback position is indicated by L and R to the right of the buffer on/off button, and the start and end points can be adjusted by dragging. The left and right channels can be edited independently, or linked by clicking the Link button between L and R. You can also reverse the playback direction with the reverse button on the right. The scale changes depending on the Grid settings, allowing for finer adjustment.
The movement determines how to select the buffer position from the grid extent. SLIDER: Moves smoothly between ranges. GRID: Lock the buffer position to the last Grid point that the timeline passes through. RANDOM: Specify the buffer position from anywhere between ranges. The degree of change depends on the Grid.
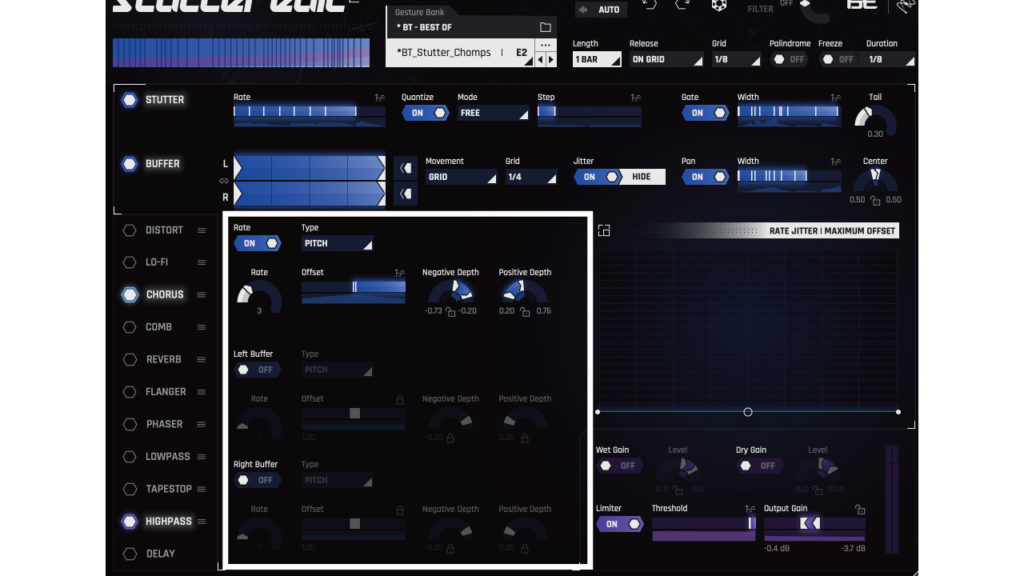
Jitter: Jitter adds a customizable offset amount. You can use the Edit button next to the on/off button to view the adjustable parameters. Rate/Left Buffer/Right Buffer can be added on/off respectively. There are two types, PITCH and RHYTHM.
Pan: Width controls the spread and Center controls the panning. When Width is 0 and Center is swung to the left or right, only L or R is available.
Effects
Effects can be rearranged as you like by dragging and dropping the three lines, except for the stutter and buffer at the beginning of the chain and the delay at the end.
With REVERB and DELAY, you can also use “Cut on Release” to cut the reverberation when you go around.
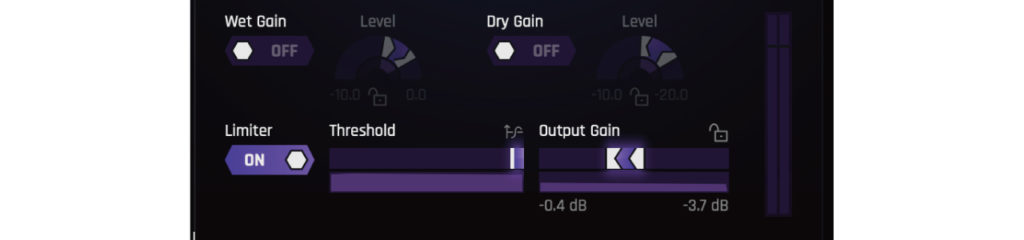
In the lower right, you can adjust Wet / Dry gain, Limiter and Output gain.
Each of these can also be controlled by TVM.
In case of Limiter, Threshold is controlled by TVM.
iZotope Stutter Edit 2 Plugin Boutique
Summary
Stutter Edit 2 is an indispensable effect for electro and DJ.
It’s useful because you can easily apply very detailed effects.
I hope this article is helpful for you.
iZotope Stutter Edit 2 Plugin Boutique